Guide to sending sales emails with HubSpot Sequences
Email sequences are a great tool for just about everything sales-related. From prospecting to following up to form...

Email sequences are a great tool for just about everything sales-related. From prospecting to following up to form submissions, sequences can help you automate tasks and keep a steady line of communication with your prospects and customers by sending automated emails and LinkedIn messages. This guide shows you how to get started with sequences in HubSpot.
Before you use email sequences, you'll need to ensure that your email is connected to HubSpot. Check out this blog post to connect your email and calendar to HubSpot, set up your personal meeting link, and automatically add Zoom meetings to meetings that are booked using your meeting link.
The HubSpot Sequences tool allows you to build out a series of calls, emails, tasks, and LinkedIn actions. For this example, we're going to build a prospecting sequence with the goal of getting our prospects to book a meeting with us. To do this, we're going to string together a series of three emails.
1. To create your email templates, click Conversations and select Templates.
2. On the right side of the screen, click New folder. To help keep our email templates organized, create a folder with your name and the type of campaign you're running. For this example, I'll call my folder Mike Dupuy - Outbound.
3. Click New Template and select From scratch. If you'd like to browse sample emails HubSpot has already put together, you can select From template library.
4. In the Name field, add an internal name. I tend to append the number of the email in the sequence as well. For this example, I'll use Mike Dupuy - Outbound - Email 1.
5. Add your subject line and body copy.
Make sure you take advantage of the personalization capabilities of HubSpot by clicking on Personalize. As a starter, you can use Contact › First name in your greeting and Sender › Full name in your closing.
If you're building out an email template that you'd like to add some customization to for every contact, try using the Placeholder option in the personalization dropdown menu.
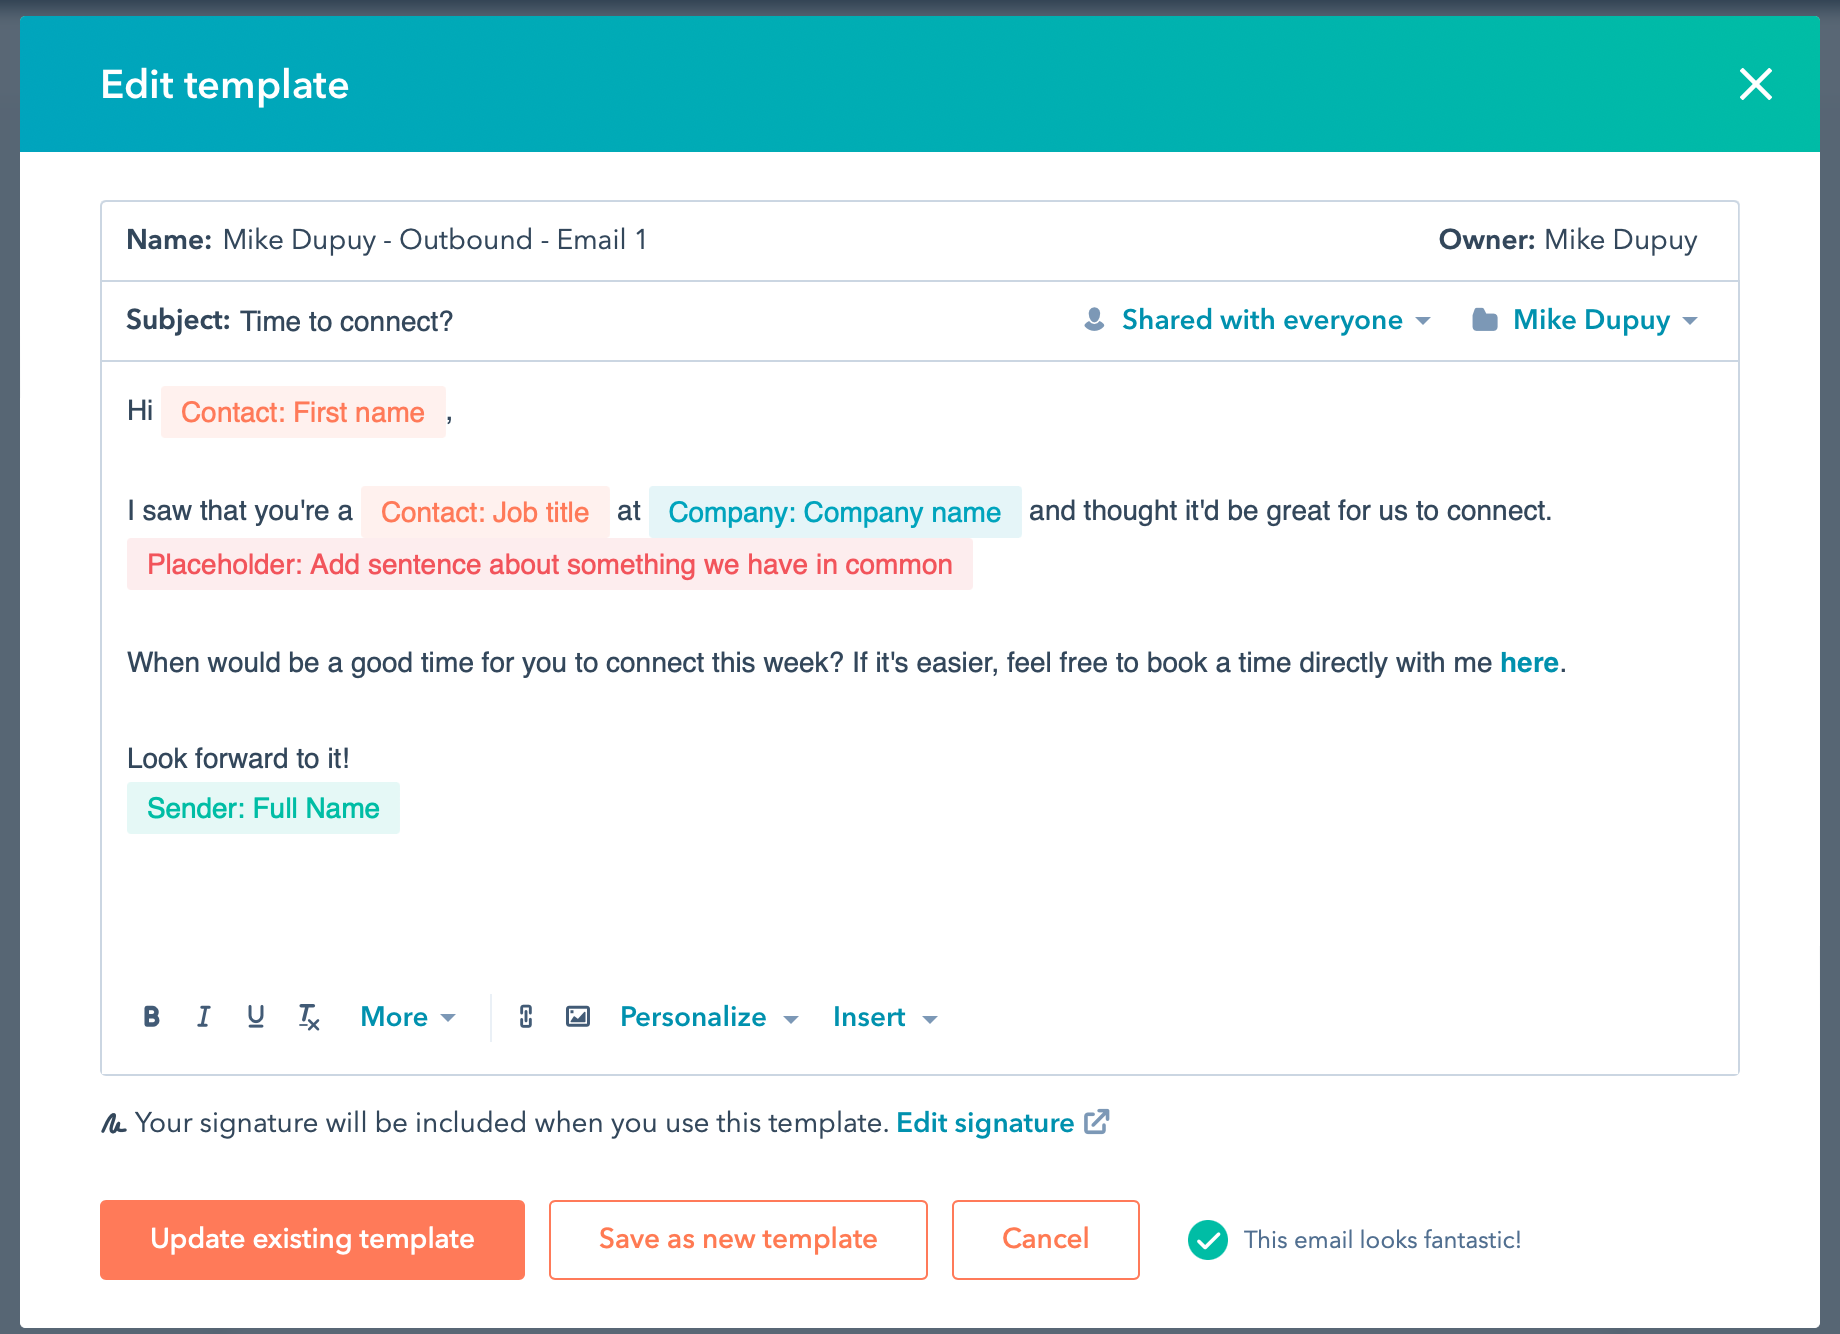
When you're ready, click Save template.
Repeat this step for the other emails you'd like to send in your sequence.
If you haven't done so already, make sure you update your HubSpot email signature. You can do this by clicking Edit signature below the email template editor window. This is a great place to add your meetings link.
Now that we have our emails, it's time to build out our sequence.
1. Click Automation and select Sequences. If you don't have access to Workflows in HubSpot, you'll see Sequences in the main navigation.
2. Click the Manage tab.
3. Click New folder and create a folder with your name. I find it's easier to navigate back to all of my sequences this way.
4. Click Create sequence.
5. You can use one of the prebuilt sequences or build your own. For this example, leave the selection on Start from scratch and click the Create sequence button.
6. Go to the Settings tab and choose your desired send windows/business hours. HubSpot will automatically optimize the time it sends the emails to your contacts within that window.
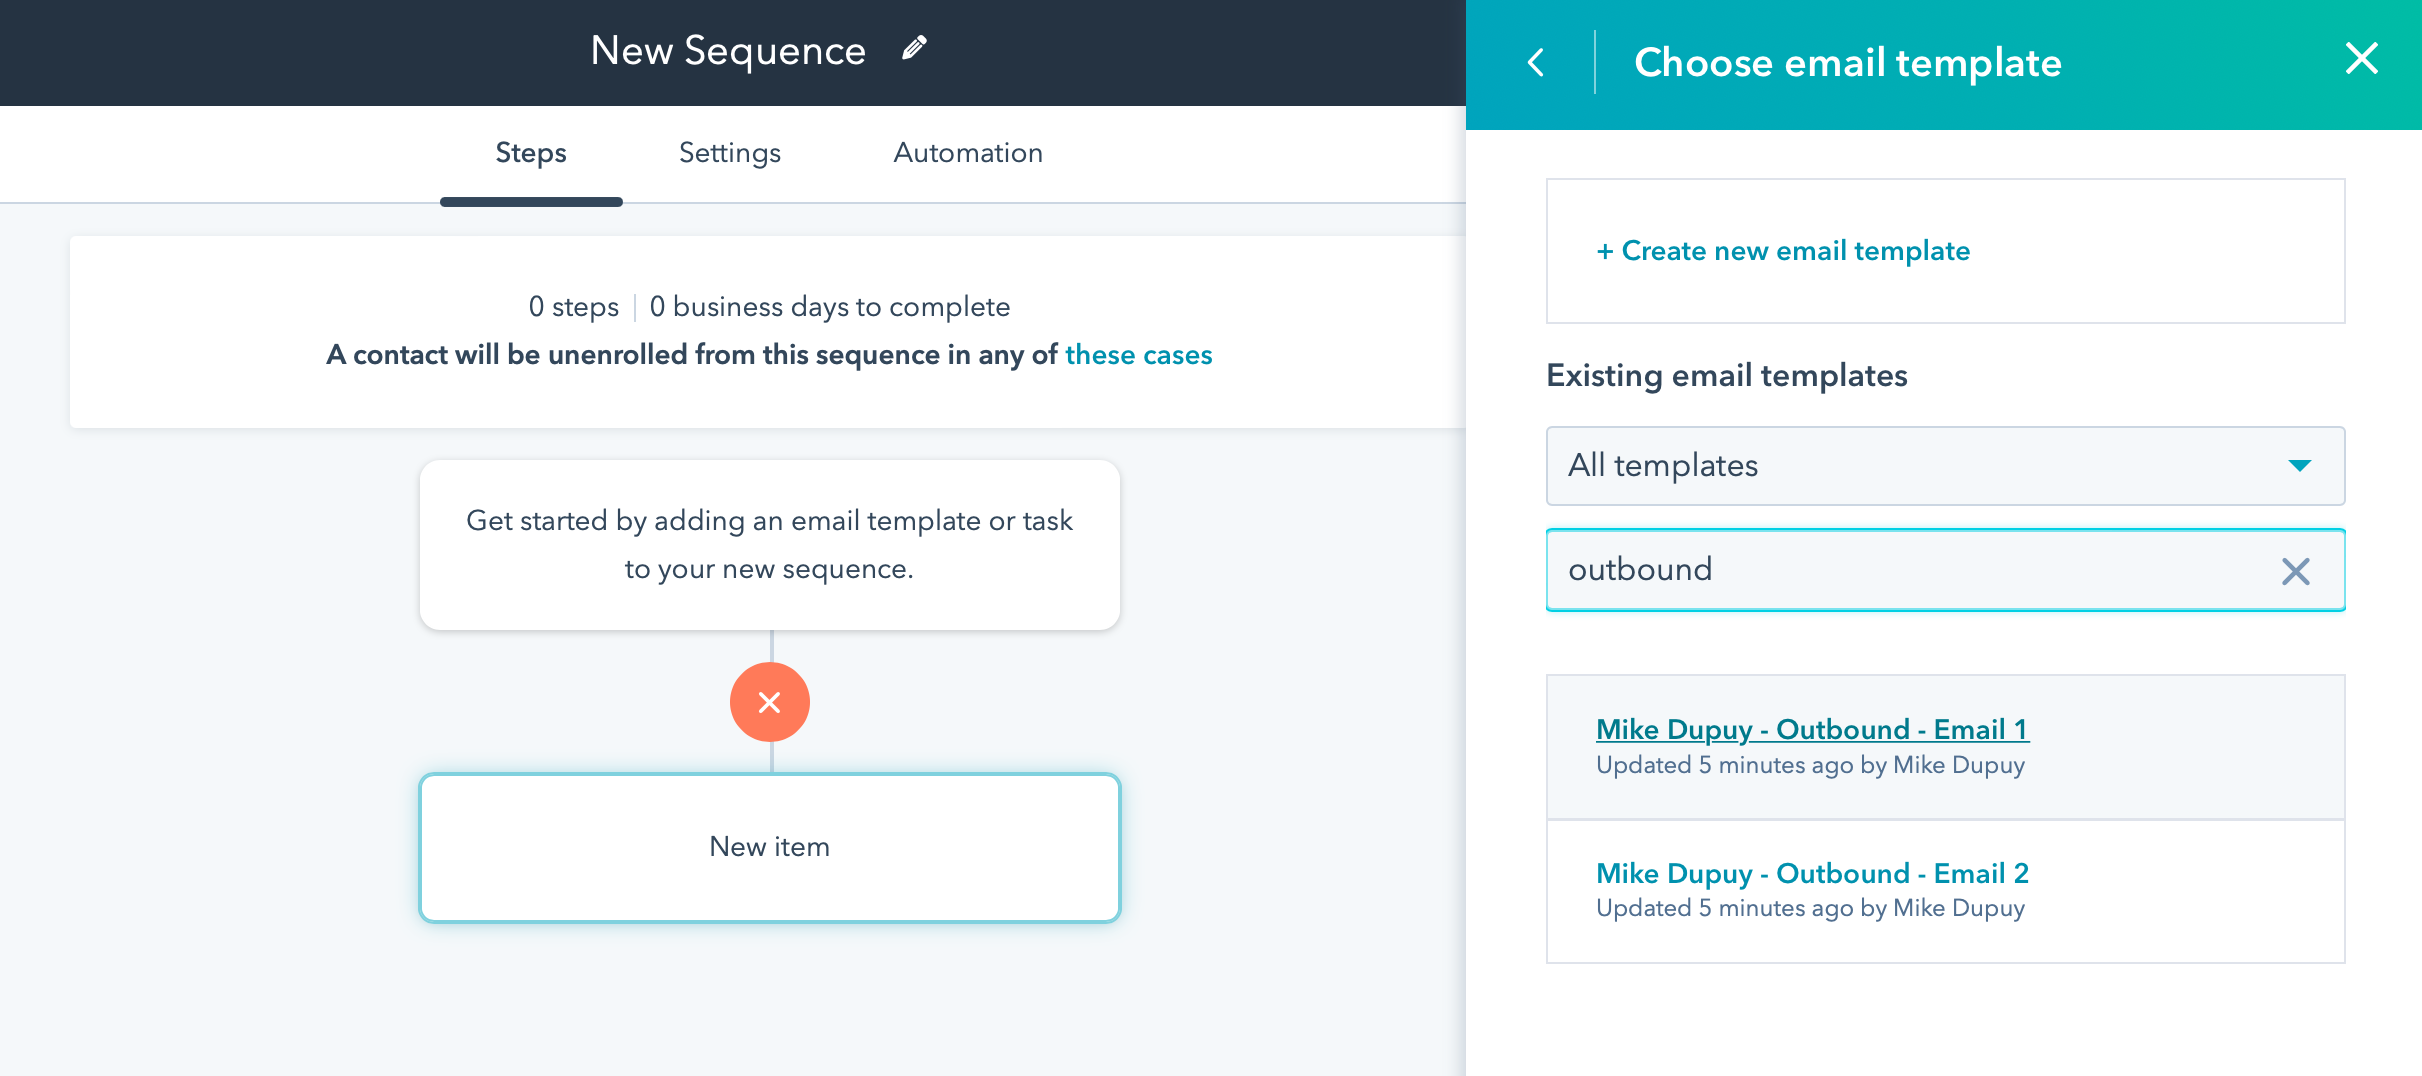
7. Click on the Steps tab and click the + button.
8. Choose Automated email and select the first email you built in Step 2.
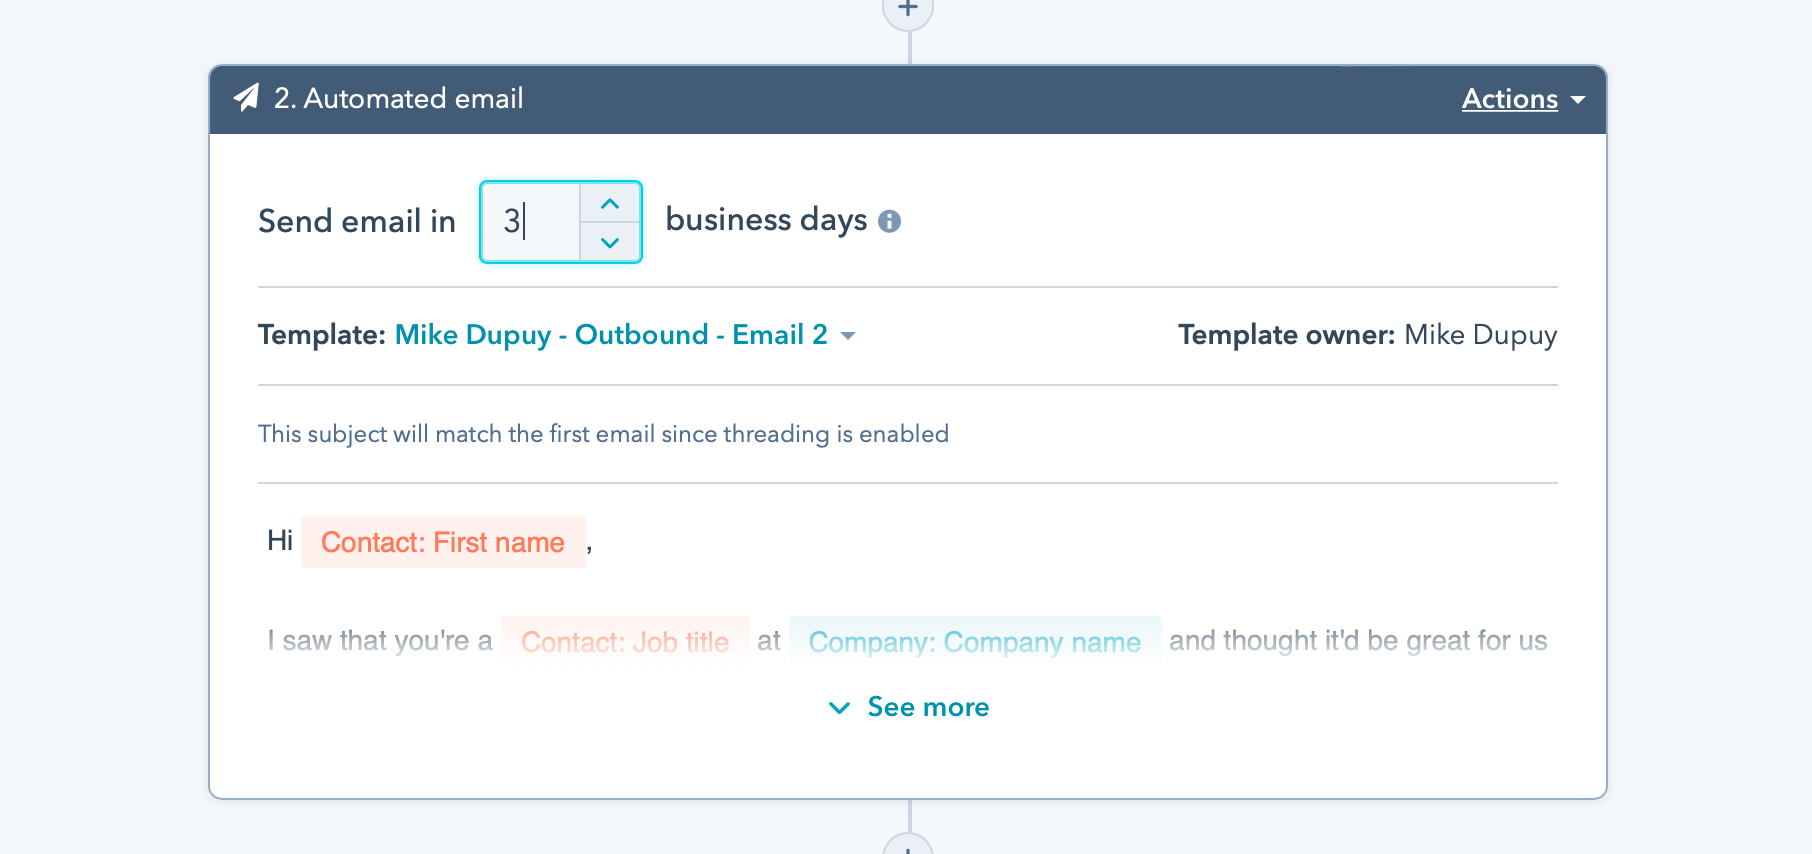
9. Below the preview of your first email, click the + button again and add your second automated email. Repeat this step for all of the additional emails you'd like to send.
10. At the top of the subsequent emails, choose the number of business days you'd like to wait between emails. For this example, I used 3 business days.
11. Add any additional steps you'd like such as calls, LinkedIn InMails, LinkedIn connection requests, and manual tasks. I typically like to end my sequence with a task to update the notes on the contact record.
For the next step, you're going to select the contacts that you'd like to enroll in the sequence. To do this, we're going to use a HubSpot list.
1. Click on Contacts and select Lists. If you don't see this option, you may need to request additional permissions from your HubSpot administrator. You can also enroll contacts into a sequence directly from the sequence or from the main Contacts page.
2. You can either create a new list, choose an existing one, or import contacts to HubSpot. For this example, we're going to import new contacts to the database. Click Import.
3. Click Start an import, choose File from computer, and click Next.
4. Select One file and click Next.
5. Select One object and click Next.
6. Choose Contacts and click Next.
7. Drag your CSV or XLSX file onto the window. When formatting your CSV/XLSX file, make sure you have a header row with the properties you'd like to import for those contacts. Example properties I like to include are:
HubSpot will show you a preview on the next screen to ensure your columns are correctly mapped. If you're importing a list with excess columns, select Don't import column in the Import as column of the import wizard.
If you have additional unmapped columns, check the box Don't import date in unmapped columns. Then click Next.
8. On the last screen, name your list and check the two boxes below: Create a list from this import and the compliance statement.
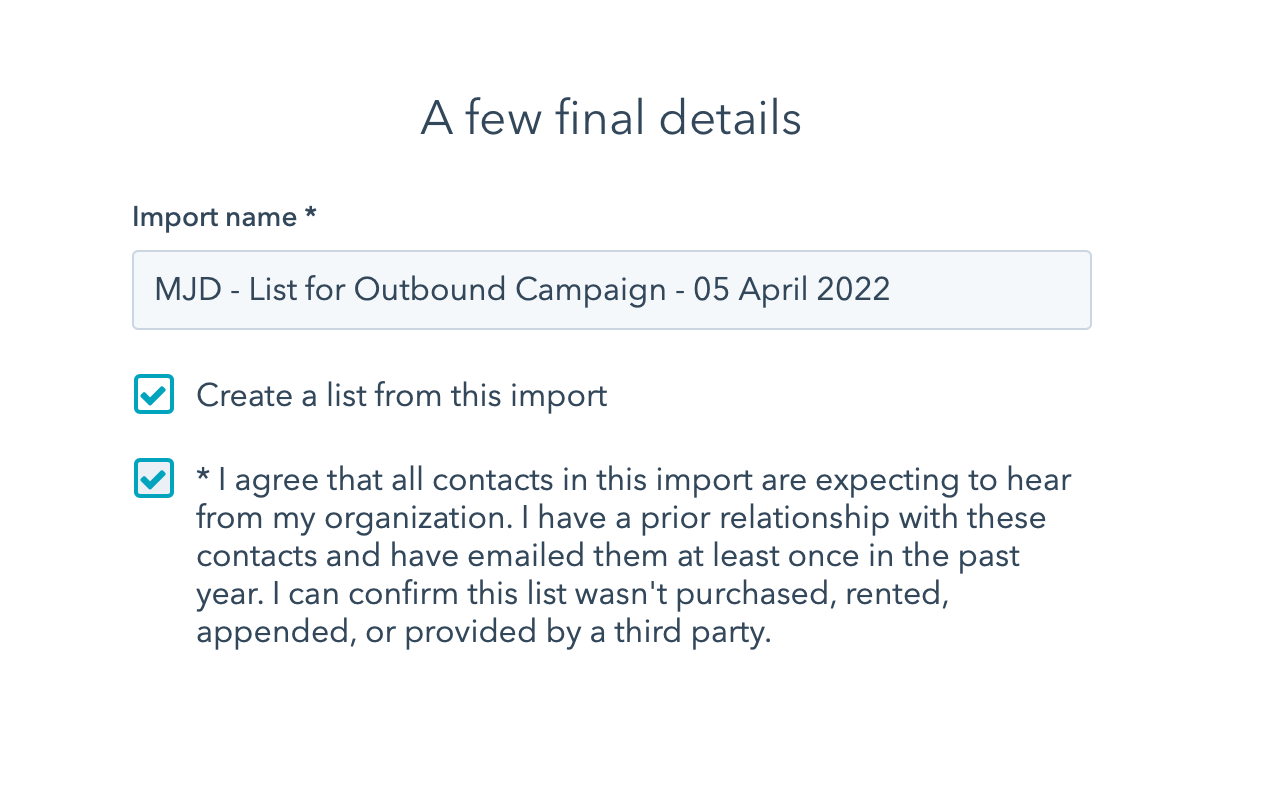
9. Click Finish import.
Now we're ready to get contacts loaded into our sequence.
1. Navigate to the list you just imported by clicking Contacts and selecting Lists.
2. Select contacts in your list by checking the box at the top of the page. Sequences will allow you to enroll 50 contacts at a time (up to 500/day). When up to 50 contacts are selected click Enroll in sequence.

3. Preview the sequence and make sure everything looks okay. You can use the left side window to select specific contacts to see how the personalization tokens you used will be applied for that particular contact. Once that looks good, click Enroll [Number] of [Number] contacts.
Voilà! Your contacts have been enrolled.
Now that they've been enrolled, you'll be able to navigate back to your sequence to see the performance data.
1. Click Sequences.
2. Click the Manage tab and locate your folder with your sequence.
3. Click on the sequence name to get to your sequence dashboard.
The sequence performance dashboard will show you how many contacts you enrolled as well as the number of opens, clicks, replies, and meetings you received from that sequence.
Hopefully you found this guide helpful in getting your sequences set up for the first time. If you're ready to supercharge your sales teams with automatic sequences that drive qualified opportunities, we're here to help. Get in touch with us here.